Hey
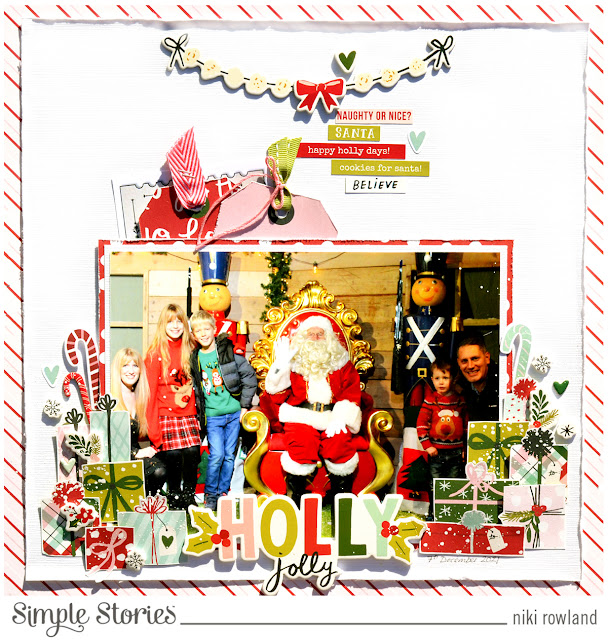
everyone! Here is a new layout for Simple Stories using the beautiful Holly
Days collection. I love Holly Days because it has pink in it and I just adore
pink for Christmas!
I have used a 6x8 photo today which I find difficult to scrap with so I’m a bit
out of my comfort zone, but I got the photo at our visit to Santa so even
though I have scanned it and could print it smaller, I feel bad throwing the
original away or leaving it in a cupboard for years, so I have gone ahead and
scrapped it!
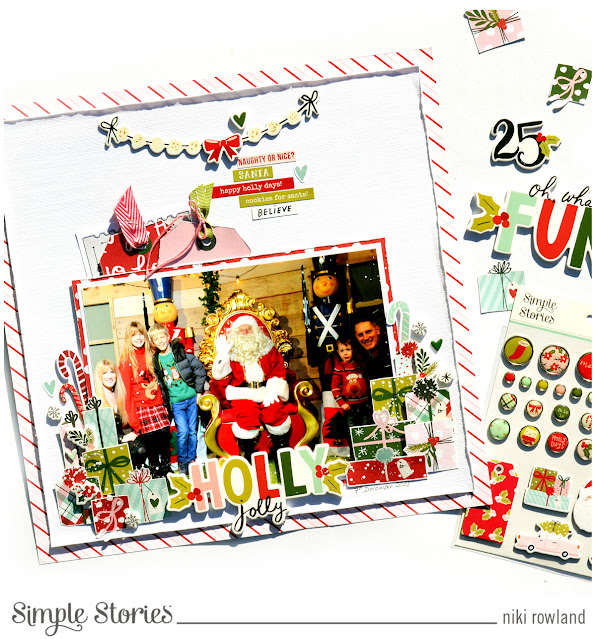
I went for
a central design and have anchored the elements towards the bottom edge of the
layout. I started off with a white background mounted onto the beautiful pink
candy stripe paper. I mounted my photo and added it centrally to the
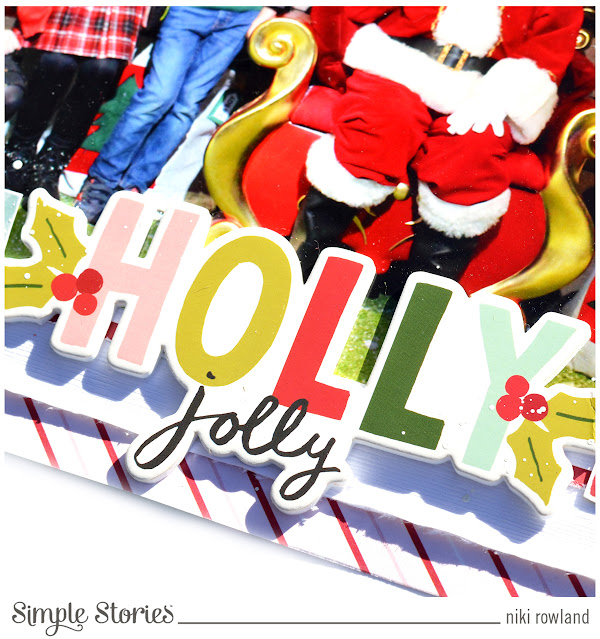
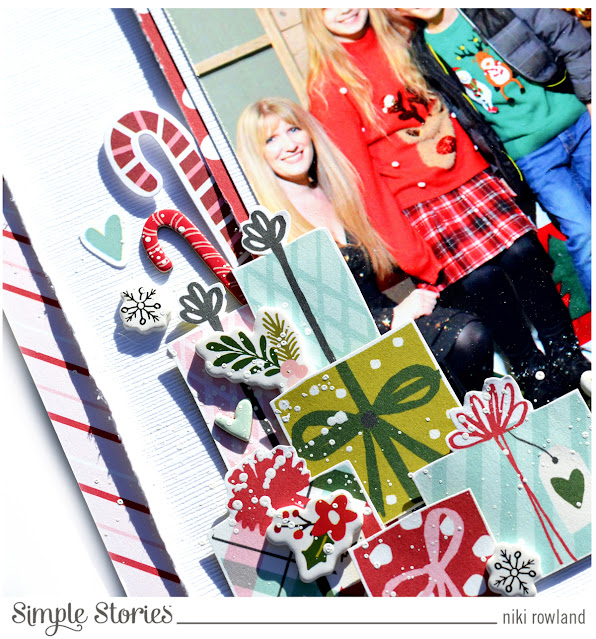
background. I added my title ‘Jolly Holly’ to the bottom of the photo, this was
from the Foam Stickers which are full of gorgeous titles.
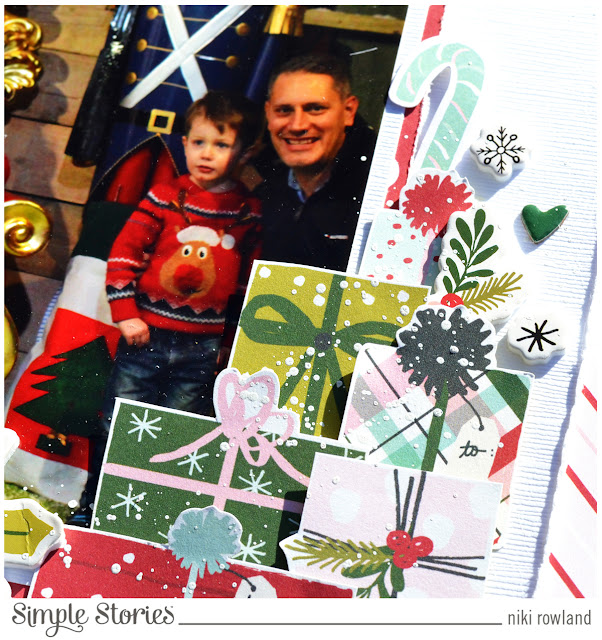
I made my
photo into a pocket to hold our Santa ticket and two journaling tags from the
Tags paper. I then fussy cut loads of presents which I layered and stacked around
the two lower corners of the photo. I added to these clusters with ephemera
from the Bits & Pieces pack, Chipboard Stickers and Foam Stickers.
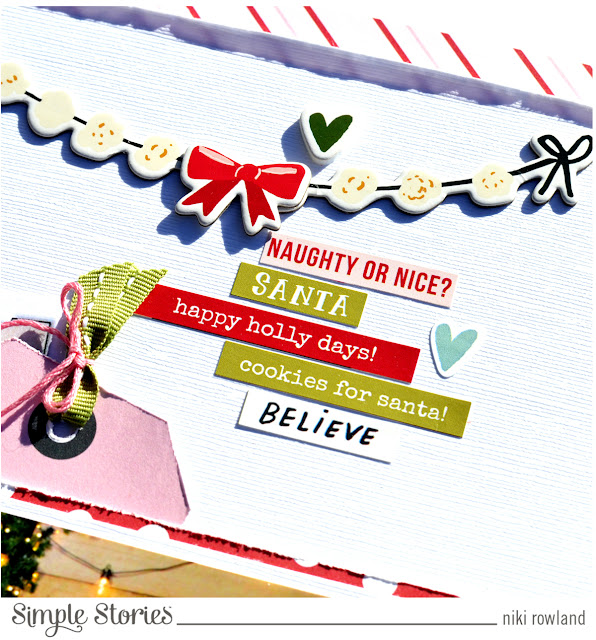
I created a
cluster at the top with Chipboard Stickers and several label stickers from the
Cardstock Stickers. I finished off with some splatters of white paint.
Thank you
so much for joining me today and happy scrapping
Hi there everyone
and Merry Christmas! I have a new layout to share today for Hip Kit Club using
the beautiful November kits. You can
find the November kits on the Hip Kit Club website here: https://www.hipkitclub.net/november-2021.
Today I
have been inspired by the beautiful December moodboard. I used the image of the
baubles mainly for my inspiration and decided to use some of the pretty papers
as baubles by making paper rosettes. I made lots, in several different sizes. I
actually ended up with so many that they wouldn’t fit on one page so I decided
to turn my layout into a double!
I arranged
the baubles across the page in a horizontal design. I used a pencil to lightly
draw around them and then I took them all off the page again. I then used a
star stamp from the Stamp Kit to stamp using embossing ink. I then used the
Silver Tinsel Embossing Powder to heat emboss the stars – I love the result!
I then
stuck my baubles in place and added hangings using embroidery floss. I added my
photos to the centres of the larger rosettes.
I used lots
of the beautiful fabric bows to adorn the top of each photo. I then added lots
of small embellishments to the layout including chipboard circles, silver
stars, and some ephemera.
I added two
titles using the Chipboard Stickers and finished off with splatters of white
paint.
I
absolutely love how this layout turned out and I’m so pleased I turned it into
a double!
Happy scrapping
Hey everyone! I have some more December Album
pages to share today, this time using Simple Stories Holly Days collection. I
think this is my favourite Christmas collection this year…mainly because it
contains pink and I love pink for Christmas!
For my title page I have used white card as my
base. I’ve kept it really simple with just a few embellishments and the word
December, which is a red mirror-finish acrylic word from a shop here in the UK.
Above the word December, I’ve added a snowman sticker, Christmas tree and hot
chocolate mug. I wrapped some pink thread wrapped around the page and also
added the 2021 number using stickers from the Foam Stickers pack. I finished
off with a few hearts and snowflakes and a bow. Sometimes keeping it simple
really looks beautiful.
For Day 1 I’ve made an advent calendar style
page, using the numbers from the 2x2 Elements paper. I cut up numbers 1-12 and
distressed the edges of each and machine stitched around the edge. I arranged
these onto my page. For three of the numbers I made them into little doors for
my photos to hide behind. I decorated some of the other numbers with enamel dots,
puffy stickers and Bits & Pieces.
For Page 2 I used one of the red papers from
the Holly Days 6x8 Paper pad as my background and I created a pocket on the
front from white cardstock. I can add a photo to the front of my pocket as well
as the piece that pulls out from inside. I’ve used one of the Foam Stickers to
decorate the front of the pocket and some candy canes too.
Page 3 is super simple with one of the Foam phrases
at the top of the page and three houses, a tree and the number 3 at the bottom
corner. I promised myself I would include some simple pages this year as last
year’s album was a bit overly complicated!
I have turned Page 4 into a shaker pocket. I
used a Simple Stories Snowflake cut file to cut out a snowflake shape from the
middle of my white background. I backed this with acetate, made a ‘wall’ of
foam pads around the shape, filled it with sequins and backed it with pink
card. I love the effect. I added an outline to the snowflake to make it stand
out more, added machine stitching around the outside, ‘Deck the Halls’ phrase
at the bottom and added the number 4. This page is a pocket page with an insert
that pulls out from the side which is where I will add my photo and journaling.
Day 5 is my favourite of the whole album. I
adore the 6x8 paper with the Santa scene. I have made this into a feature page
too, and again my photo and journaling can go on the insert that pulls out from
the side. I embellished the scene with hand stitching and glitter details. I
also added a few Bits & Pieces, some presents and my number 5. I love how
this page turned out.
For Day 6 I’ve used three large circles on a
patterned paper background and added a few embellishments, including present
stickers which coordinate with the presents on the facing Day 5 page. I added
machine stitching around the edge of this page too.
Day 7 is very simple and will contain a full
page photo, trimmed to showcase the beautiful Holly Days pattern behind it. I’ve
created a small embellishment cluster that can be detached from the base page
and placed where appropriate when my photo is available.
Day 8 has space for a 6x4 photo across the top
and I’ve created an embellishment cluster stretching right across the bottom edge
of the photo – I love that the stockings and ornaments are hanging from the
photo!
I hope you have enjoyed these pages! I really
love creating my December Album. By the time this video and post go live we
will be into December and hopefully I will have started adding my photos. I
wonder how they will turn out!
Hey
everyone! Here is a new layout for Hip Kit Club using the November 2021 Kits.
You can find the November kits on the Hip Kit Club website here: https://www.hipkitclub.net/november-2021.
Today is
Product Focus Wednesday and I decided to focus on the beautiful patterned papers
from the November kits and the Floral Ephemera.
I choose
two patterned papers: the red one and the pink one. I cut these into 4” squares
and origami folded them into flowers. I made four of these flowers in each
colour. I then arranged them into a circle shape to form a wreath.
I added
some ink from the November Color Kit under where the wreath would sit. I also
added my photo in the centre of the wreath so it was framed by the flowers.
I then
added lots of floral ephemera around the outside of the flowers. I built up
lots of layers of flowers and leaves. I then also added hearts, stars and
enamel dots. I even stamped red stars using the Stamp Set around the outside of
the wreath too.
I finished
off with a few white splatters.
Thank you
so much for joining me today and happy scrapping
Hey
everyone! I have something a little different to share today…some DIY Christmas
Crackers! I’m using the Let Us Adore Him collection by Bella Blvd.
I used a
Silhouette cut file to cut three crackers from three different papers from the
Let Us Adore him collection. I chose fairly plain prints in red, green and
blue. I also cut the initials of my three children from these same papers.
I assembled
the crackers and tied ribbon around the ends. I then set about embellishing
each one.
For the
blue cracker I added a red circle sticker layered with a white circle and the
added the M initial. I layered this with some Christmas trees from the Let Us
Adore Him ephemera and ‘this Christmas’ banner. I also added some little
musical note circles, a puffy heart and some enamel dots.
For the
green cracker I created a circle for the T initial using a red sticker and a
white circle. I positioned this to the right of the cracker and layered it with
some blue flowers, a blue present. I also added musical note circles to this
cracker, together with some puffy flowers and enamel dots.
For the red
cracker, I punched a white circle to hold the S initial and I positioned this
centrally on the cracker. I added a tree ephemera, two flowers and two
presents. I also added heart stickers, flower ephemera and some puffy stickers:
holly leaves and trees. I also added enamel dots.
Finally I
splattered all three crackers with white acrylic paint. I will fill these with
chocolates and put the on the table on Christmas Day – how fun and the children
will love them!
Thank you
so much for joining me today and happy scrapping
Hey everyone! I have a new layout to share for
Hip Kit Club and I’m using the November 2021 Main Kit only today. You can find
the November kits on the Hip Kit Club website here: https://www.hipkitclub.net/november-2021.
I fell in love with the starburst paper the
moment I saw it and decided to cut it up into sections. I then distressed all
the edges, cut some down and then arranged the red and blue ones onto a white
background in a starburst effect. I love how all the points provided a natural
place to put my photo.
I went through the ephemera to look for red and
blue pieces that would work with my layout and I found quite a few: a Christmas
tree, labels, Wish Season title, baubles, houses and snowflakes. I arranged
these ephemera pieces around my photo and onto the starburst colours too.
I used the foiled Wish Season ephemera as my
title but also added ‘merry Christmas’ chipboard phrase under my photo.
I then added lots of those absolutely gorgeous
silver glittery enamel dots – these have my heart totally! I finished off with
a few splatters of white paint.
Thanks so much for joining me today and happy
scrapping
Hey everyone! Here is a new layout for Hip Kit
Club using the beautiful November kits. You can find the November kits on the
Hip Kit Club website here: https://www.hipkitclub.net/november-2021.
I’m playing along with this week’s
challenge which is a sketch challenge!
The sketch has a big tree on it and I decided
to take that literally and to make a large tree for my layout. I used a super
simple folded paper technique to make five triangles for my tree.
The sketch has two photos represented on it but
I only wanted to use one so I paired it with a journaling card from the
November Pocket Life kit.
Under the photos and the tree I added some ink
from the November Color kit. I used the Polished and the Seafoam colours to
lightly apply some colour to my white background. I then stuck my tree, photo
and journaling card on top.
I added my title using the alphabet stickers in
the kit and then added lots of beautiful ephemera flowers. I also added some
ephemera candy canes, 25 sticker and a red bow.
I punched several silver stars from one of the
cardstock sheets and dotted these around the layout before finishing off with
splatters of white paint.
Thanks so much for joining me today and happy
scrapping
Hey everyone, I have a new layout to share
today for Bella Blvd using the Let Us Adore Him Collection. I really love this
cute collection which is packed full of pretty Christmas colours and icons.
I opted for a star theme today and cut out
several stars from the patterned papers in the collection. I used metal dies
for this and cut three different sized stars from five different papers. I
wanted some solid pink too so grabbed a sheet from my Bella Besties pack. I
then scored each of the stars five times from each point, then folded them all to
create 3D stars. I love the effect and they are so very easy to do!
I arranged all my stars onto the layout
together with my photo and a few squares from the ephemera. I arranged these on
both sides of the layout, leaving a gap in the middle. I wanted my title to be
the middle feature of the layout so having that gap worked as a great place for
my title.
I created my title out of an ephemera word ‘Christmas’
and then used the beautiful Florence Alphabet stickers in red to create the
rest of the title, which reads ‘the magic of Christmas’.
I then added lots of adorable puffy stickers! I
used the ones from this collection to add trees and stars. I also added red puffy
Trinkets – hearts and stars. I also added enamel stars and a few dots too.
I finished off the layout with splatters of
white paint. I absolutely love how this one turned out.
Thank you so much for joining me today and
happy scrapping