Autumn Moodboard Scrapbooking Inspiration with Cocoa Vanilla Studio Heart & Home

Sunday 22 October 2023


Do you love or loath moodboards? I love them but I know some people struggle to interpret them. I tackle them by making a list of all the things I see and then I try to incorporate as many of them as possible into my layout.

For the beautiful October moodboard set by Sophie, this is the list I made: acorns, check print, web, leaves, wooden round, circle shape, flowers, words (script font and regular), knitted yarn/wool, pumpkins, woodgrain, the colours (green, orange blue, brown, pink, peach, yellow), Autumn theme. That’s a long list!

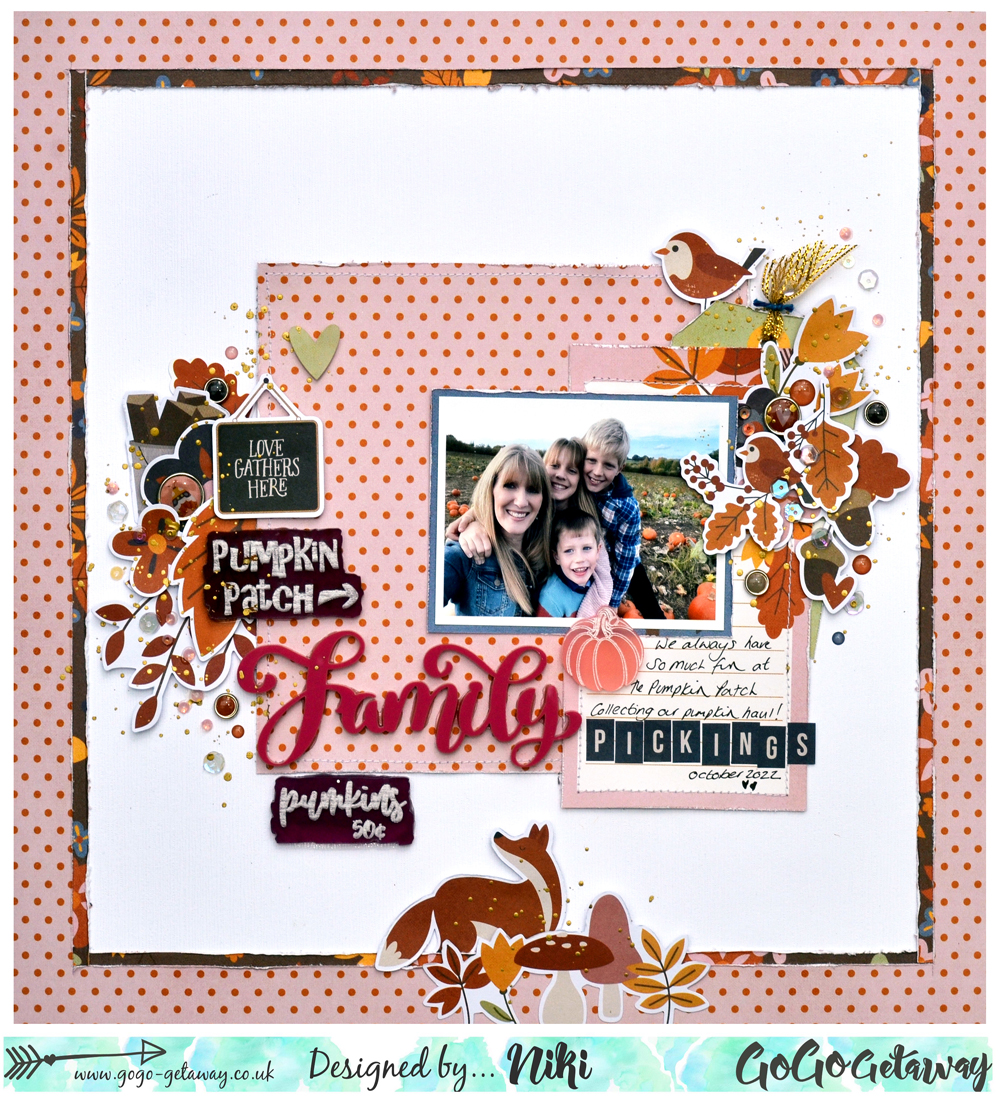
I was mostly inspired by the central photo of the wooden round. I used the A5 paper stack sheet of woodgrain paper and cut out the largest circle possible. I distressed the edges. I mounted my photo onto a check print.  I arranged my photo and Floral Ephemera to the right of the circle together with a Ephemera frame. The frame has acorns on it. I arranged all these elements as per the central photo of the wooden round, together with my title too over on the left. So far I’d incorporated: acorns, check print, leaves, wooden round, circle shape, flowers, words, woodgrain, the colours and an Autumn theme. Lots of boxes ticked there!

I added some ink under the area where the flowers would sit. I used a peach shade and then added some darker ink splatters over this area. 

I wanted to incorporate the knitted yarn so took some white embroidery thread and cut three long lengths. I then plaited these and make a piece long enough to go around the edge of my wooden round. I just stuck it in place. I also added a doily under the wooden round, which could (at a stretch) represent the web on the moodboard. So now I could also tick off: web and knitted yarn. That’s pretty much everything except the pumpkins.

I added a few more fussy cut acorns, handwrote my journaling, and added some puffy heart stickers. I also created a little torn area on the left side of the layout backed with patterned paper, to balance out the very large cluster that was over to the right side.

So I think I nailed the moodboard and I hope that you have enjoyed seeing how I tackle a moodboard!

Happy scrapping

Niki xx

@nikiclairecreates

[ad]  


It's a Monster Party! Halloween Scrapbook Layout with Bramble Fox Perspextives


It’s a Monster Party!! Halloween scrapbooking is so much fun! I adore the Monster Party Perspextive set by Bramble Fox because it is perfect to scrap photos of my very own little monster!

The Monster Party set contains two titles: Monster Party and Yay, three little monsters and a star, all in shades of blue and green.

I’ve used the FaBOOlous collection by Simple Stories and picked out all the black and grey shades for this layout. I’ve used a black background as my base and added a ghost pattern in the middle with a grey strip across the centre. I’ve used four photos, in a few different sizes and arranged these across the layout.

I’ve used Monster Party as my main title but also used Yay and the monsters included in the set too – they are super cute!

I added a few embellishments from the FaBOOlous collection, gorgeous sequins by Spiegelmom Scraps and splatters of black paint.

I love how fun the layout turned out!

Thanks so much for joining me today and happy scrapping

Niki xx

@nikiclairecreates

[ad]


Boo! Halloween Layout using FaBOOlous by Simple Stories

Saturday 21 October 2023


EEK! Another FaBOOlous layout using the FaBOOlous collection by Simple Stories_  This layout didn't quite turn out how I'd originally planned but it is faBOOlously spooky just the same!

I started by trimming down the orange and black checked paper and then I made cuts from the outside edges towards the centre. I positioned this onto a black background and positioned all the pieces, stuck them in place and machine stitched through each one. I added small pieces of orange and black patterned papers to some of the edges and then began tucking ephemera pieces in.

I added two photos in the middle of the layout and build clusters using Floral Bits on their side. I added a Foam Sticker ‘Boo’ as my title.

I tucked in lots of fun Bits & Pieces to the background – I wanted it to look as though the ghost and skeleton were emerging out from the gaps in the background paper. I added Decorative Brads, and lots of Cardstock Stickers too.

I finished off with Enamel Dots and splatters of black paint.

Even though it didn’t quite turn out as I had originally planned, I think it turned out to be a fun Halloween layout!

Happy scrapping

Niki xx

@nikiclairecreates

[ad] 


Spooktacular! Halloween Scrapbooking Layout using FaBOOlous by Simple Stories

Friday 20 October 2023


Here is my second layout using the fabulous FaBOOlous collection by Simple Stories! For this layout I choose a black background and added large pieces of torn patterned papers from the collection.

I layered my photo together with one of the Chipboard Frames, a tag from the Tags paper and large pumpkin ephemera from the Floral Bits. I turned these elements into one giant cluster on the right side of the layout.

I added a title ‘Spooktacular’ from the Foam Stickers and then continued to build up the large cluster. I added more Floral Bits, more Bits & Pieces, Decorative Brads, Chipboard Stickers, Enamel Dots, and Cardstock Stickers. I raised a lot of these elements up on foam pads to give the layout extra dimension.

I finished off with some journaling strips and splatters of black paint over all the embellishments.

Thanks so much for joining me today and happy haunting!

Niki xx

@nikiclairecreates

[ad] 


FaBOOlous! Halloween Layout using FaBOOlous collection by Simple Stories


Hi everyone, here is a new layout for Simple Stories using the FaBOOlous collection! I adore Halloween so was super excited to cut into this collection.

I started off with that cute orange pumpkin face paper which I trimmed down and folded over one corner. I made a feature out of that folded corner by including lots of Floral Bits and Bits & Pieces.

I added my two photos over on the right side of the layout together with the large FaBOOlous word from the Page Pieces. I built another cluster over to the right side of the title, including Floral Bits, Bits & Pieces, and Cardstock Stickers.

I then created a feature in the top right corner using Chipboard Stickers and word stickers from the Cardstock Stickers.

I added Decorative Brads and Enamel Dots to each of my clusters and added splatters using black paint.

This layout turned out so fun, I love it and I hope you enjoyed it!

Happy scrapping

Niki xx

@nikiclairecreates

[ad] 


Spooky Halloween Scrapbook Layout using a Sketch

Thursday 12 October 2023


Hi everyone! I've been playing along with the October Sketch over on For the Love of Pretty Paper. Instead of the spiderweb or circular element, I used the haunted house that was on one of my papers - I think it works! Even though I have deviated from the sketch a little bit, I still have the two photos, the circular element over at the top right, and have used multiple words for my title!
That's why I love sketches, they are so versatile and can just be a starting point to get the inspiration going!
Paper collection is FaBOOlous by Simple Stories.
Happy scrapping
Niki xx
@nikiclairecreates
[ad]


Proud Moment Back to School Layout using Bramble Fox Perspextives


We are heading Back to School today with this school themed layout using three @bramblefox Perspextives sets: Proud Moment, So Proud Clippies and School Elements - they are so fun for documenting those back to school moments! I've used @simplestories_  School Life collection, which I've been holding on to for a few years now! I don’t have a huge amount of it left and my friend challenged me to make a layout without using any patterned paper!

I mounted my photos onto journaling cards and picked out some Journaling Bits and some tags. I arranged all these in a line across the middle of the page. I added the So Proud Clippies to each of the elements.

I then just kept adding embellishments! I used ephemera and stickers to create clusters and then added Perspextives to the clusters too.

I’ve used the Proud Moment perspextive for my title, which is completely perfect for this layout.

I could not resist adding a little bit of patterned paper though – I cut a strip and added it right the top of the page! I added a couple of phrase stickers to this strip.

I finished off with handwriting my journaling into the journaling space and then added splatters of black paint. I’m really so pleased with how it turned out because I was originally worried about not having much paper, but I think it looks great!

Thanks so much for joining me today and happy scrapping

Niki xx

@nikiclairecreates

[ad]


Family Pickings Autumn Colours Scrapbook Layout using Simple Stories Acorn Lane

Wednesday 11 October 2023


Do you love Autumn Colours? For this scrapbook layout I’m playing along with the GoGo Getaway September Cybercrop Colour Challenge and the colours are a beautiful Autumnal mix of mauve, teal, gold and browns. 

I’ve used the Acorn Lane collection by Simple Stories and have gone for a central design with two large floral clusters. I’ve used Perspextives by Bramble Fox for my title and extra embellishments.

Enjoy the video and happy scrapping

Niki xx

@nikiclairecreates

[ad] 


Love This | Heart & Home Collection by Simple Stories

Monday 9 October 2023


Hey everyone! Here is my latest creation with Heart & Home by Cocoa Vanilla Studio. I love gingham and check prints so was drawn to the check side of Flurry paper. I cut it into squares by following the lines on the paper and then layered these up in diamond formations onto a white background.

I added in additional squares but with the other side of the paper showing, I love that dark blue. I mounted my photo and placed this on the bottom diamond.

I added floral clusters using Floral Ephemera and the Die Cut Ephemera. I pinch the flowers first to give them some curl and then also raise them on foam pads too so there is lots of dimension.

I added a title using the gorgeous Gold Title Ephemera ‘love this’ but I also wanted to include a sub title ‘ticket to ride’ which I did using the Mini Puffy Alphabet Stickers – these are so cute and great for titles and subtitles.

I added some cut apart words from the Golden Fields paper manufacturing strip, all of which I distressed the edges and raised up on foam pads.

I finished off by adding my journaling, and some Puffy Stickers, as well as some splatters of white paint.

Thanks so much for joining me today and happy scrapping

Niki xx

@nikiclairecreates

[ad]